By Russ Kaniuth
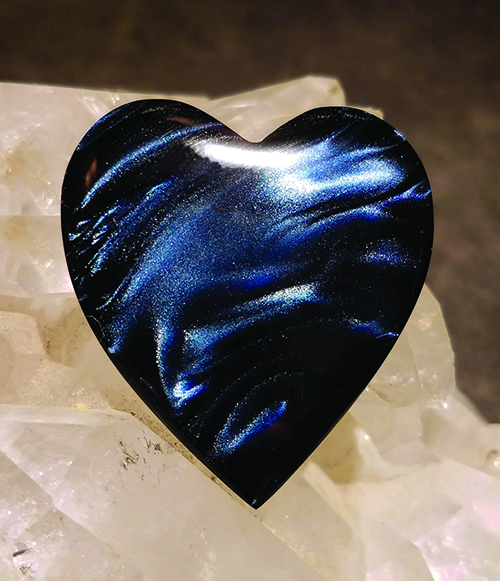
When looking for new materials, venturing from rock show to rock forums online, it’s good every once in a while to think outside the box and see what other materials might make good cabochons. In the past few years, I have seen people make cabochons from old paint chips (Fordite) and repurposed bowling balls (Bowlerite), but recently I came across a material I instantly fell in love with: Kirinite!
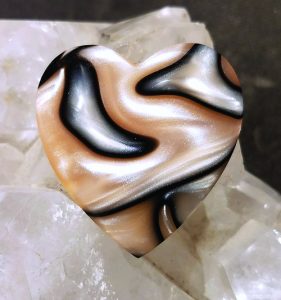
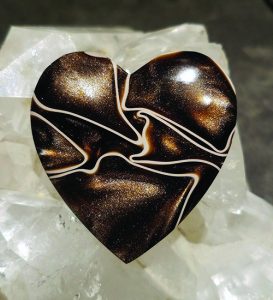
Kirinite is made by Eagle Grip Inc. for use in make custom gun and knife handles. It was designed to resist chipping, cracking, warping, and color fading—all the things you would want for your jewelry pieces. I visited their website (Kirinite.com) and discovered a rather large catalog of colors and patterns that were just amazing. The acrylic comes in sheets of different sizes and thicknesses, to fit all your needs and preferences.
Cutting Kirinite
 When I received my first order, I was super excited to get it out to the shop and start working on some new cabs. Since I have worked with many different types of polymers in the past, I was assuming these were going to be soft and make rather quick and easy cabs. I was quite surprised at what I got, though.
This acrylic was one of the hardest of polymers I have cut so far; it’s very dense and quite sturdy. I would compare this material to the average jasper.
When cutting out your preform shapes, it’s nice to be able to start with a sheet that is already your preferred thickness. All you have to do is draw out your patterned shapes and start trimming. This material did not gum up my blades, nor did any of it chip or crack while cutting, so it was no different than any other type of rock slab when starting out.
Get the scoop about the latest rock, gem, and mineral features and news, rock shop and rockhound profiles, and exclusive freebies and promotions in your inbox. >>>
Working With Polymers
With most polymers, I generally start shaping my preforms with the 220 grit wheel; however, since this material is so hard, I had to start on the 80 grit. I was apprehensive about making deep scratches that might be cumbersome to remove later, but this is something you don’t have to worry about. Kirinite shapes nicely on the 80 grit, and the 220 grit wheel smooths it out and removes scratches rather easily.
Once you reach the 280 grit wheel stage, the haze from the coarser wheels immediately goes away, and the shine and color starts to pop out at you. This is also where you want to spend your time making sure all the scratches are out before moving on, so stop and dry off your cab, and check it under a good light source at all different angles for any type of scratches. Keep in mind that many of these patterns have a great deal of depth and chatoyant motion in them, so it’s important to have a good light source and roll the cab in all directions to find all the hidden scratches.
To finish the process, I use a higher-grit Nova wheel, up to 50000 grit; however, if your setup only goes to 14000, that’s a good place to finish, as well. With the 50000 grit wheel, I didn’t feel the need to use any further polishing compounds, but Eagle Grip Inc. says they use a white rouge to get that nice, final, glossy finish.
Author: Russ Kaniuth
 Is the owner of Sunset Ridge Lapidary Arts and the cofounder of the Cabs and Slabs Facebook group.
View more of his work at www.sunsetridgelapidary.com.


