Story and Photos by Bob Rush
A few months back, I went to Medford, Oregon, to pick up a Highland Park B-12 combination lapidary unit that had been sitting unused for many decades. It belonged to my uncle and it was the machine that I learned to make cabs on in 1958. While I was there, my cousin, who had inherited his property, showed me some of his remaining rocks and asked if I wanted them. Of course, I did. Among them there was a piece of turritella agate that had a slice taken off the end. It looked rather uninspiring, so my uncle had set it aside.
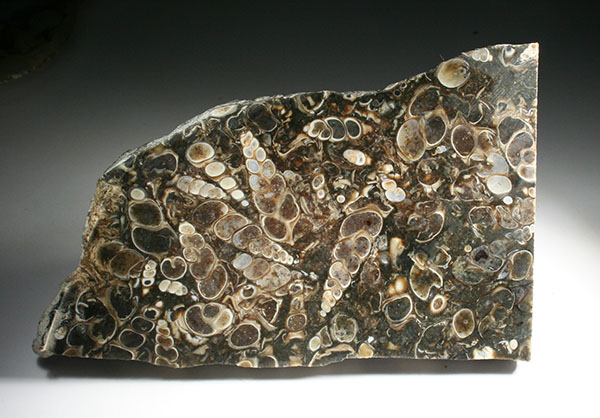
Turritella agate from the Green River Formation in Wyoming is actually misnamed, as it contains the remains of the freshwater snail Elimia tenera. The material named turritella agate has been popular as a lapidary material for so long, however, that the opportunity correct the name has passed us by.
I have often seen this material cut improperly, so that the best pattern is not revealed. The main reason for miscutting is that the material is gripped in the saw in the easiest way possible, which is on the top and bottom. If you look at the top of the rough, you will see that the shells lie horizontally, the position in which the shells of the dead animals settled to the bottom of the lake. By cutting the material parallel to the top and bottom, the best exposure to the shell pattern is presented.
I have designed and made my own rock and slab gripper, which I use for this type of material, so getting it oriented properly is easy to do. I notch grooves in the rough on opposite ends and install it in the gripper, which is then clamped in my saw for slabbing.
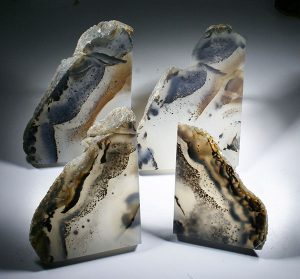
Another popular cutting material whose internal patterns require the direction of the cut to be parallel to the top and bottom is Montana agate. I recently came across a piece that is actually a quarter section of a round rock that was about 2 inches thick and 6 inches across. It was gripped on the top and bottom when it was slabbed, so the only patterns exposed were the edges of thin, black lines. By gripping the rock on the edges so that the piece could be cut parallel to the black lines, I was able to reveal exceptional patterns in the slabs.
So to get the best-looking slabs, carefully examine the rough rock for evidence of patterns before you make that first cut. You might be surprised by the results!


